Appearance
Influxdb部署
1.1.influxdb部署(tar.gz包)(推荐)
注意:此中安装和启动不需要使用root权限。
1.1.1.使用tar –xvf 解压influxdb安装包
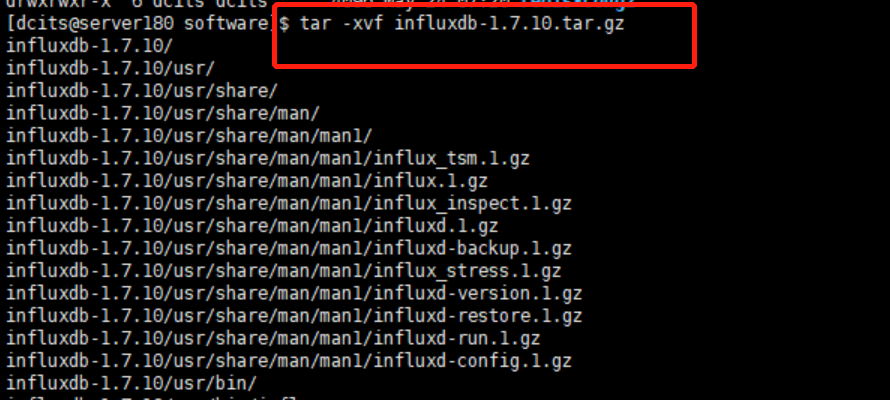
1.1.2.修改配置文件
解压成功之后进去到解压的文件夹下面找到influxdb.conf文件

修改influxdb.conf 文件中的如下配置:
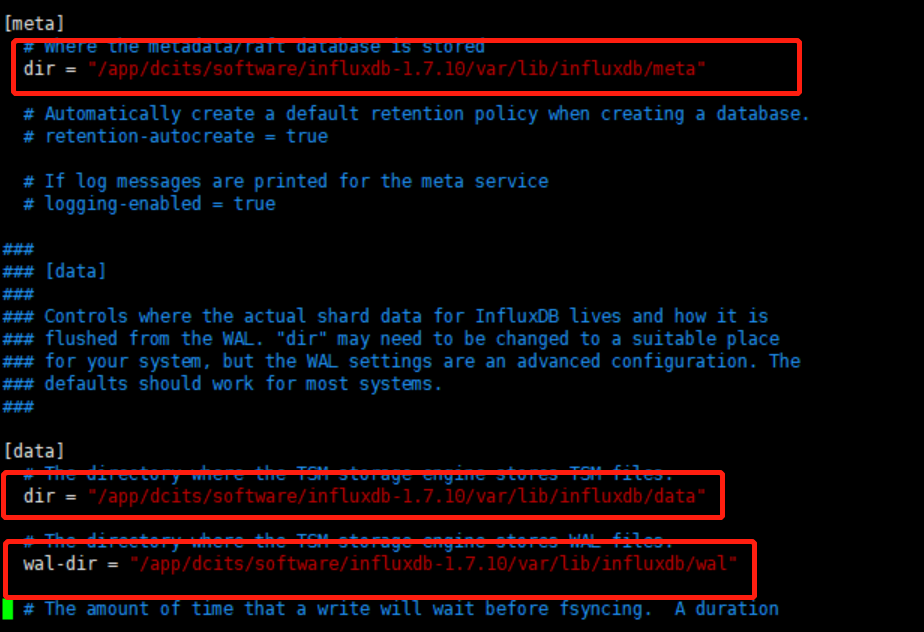

[meta]
本部分控制InfluxDB metastore的参数,该metastore存储有关用户,数据库,保留策略,分片和连续查询的信息。
dir = " /app/dcits/software/influxdb-1.7.10/var/lib/influxdb/meta"meta数据存放目录
[data]
[data]设置控制InfluxDB的实际分片数据在何处以及如何从预写日志(WAL)中清除。 dir可能需要更改为适合您的系统的位置,但是WAL设置是高级配置。 默认值适用于大多数系统。
dir = "/var/lib/influxdb/data"存储最终数据(TSM文件)的目录,此目录可能会更改。
index-version = "inmem"用于新分片的分片索引的类型,默认inmem索引是在启动时重新创建的内存中索引。要启用基于时间序列(TSI)磁盘的索引,请将其值设置为tsi1。
wal-dir = "/var/lib/influxdb/wal"预写日志(WAL)文件的存储目录。
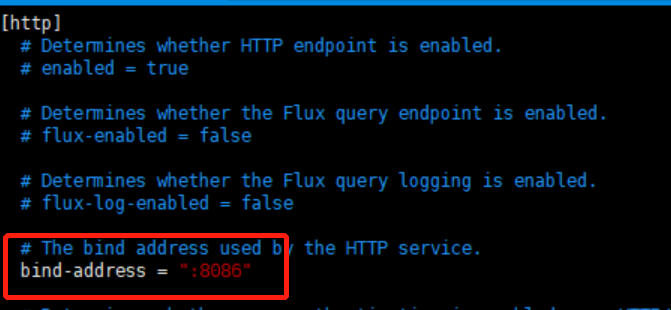
[http]
bind-address : 绑定的端口配置。
1.1.3.添加环境变量
以上配置修改完成之后保存,然后需要在服务器中配置环境变量
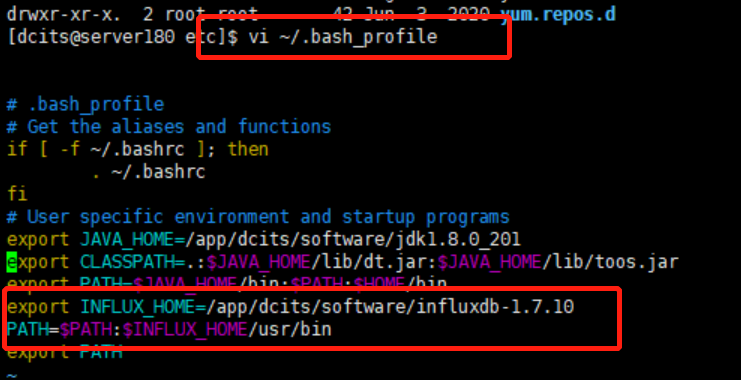
环境变量的值是influxdb解压路径下面的/usr/bin路劲
1.1.4.influxdb配置密码(可选)
修改etc/influxdb/influxdb.conf文件的auth-enabled参数为true
properties
auth-enabled=true修改完启动完成后执行如下命令设置用户名密码:
shell
# 查看所有用户
> show users
user admin
---- -----
# 设置root用户,并设置带上所有权限
> create user "root" with password 'root' with all privileges
# 发现admin权限为true了,那么admin的用户就创建好了。
> show users
user admin
---- -----
root true使用如下命令登录influxdb
shell
influx -username root -password root1.1.5.influxdb启动
- 启动前校验:确保8086端口没有被占用(Influxdb默认占用的端口实8086)。
校验命令为:
netstat -anlp | grep 8086

lsof -i:8086- 进入到解压路径下执行如下启动命令
shell
#创建日志存放目录
mkdir logs
#启动命令
nohup influxd --config etc/influxdb/influxdb.conf > logs/stdout.log 2>&1 &注意:
influxdb配置文件路径(解压包下的路劲):etc/influxdb/influxdb.conf,其中中定义了数据库对外端口。如果有需要修改influxdb的bind-address端口值,则注意:冒号、空格不能去掉。
tar.gz包中默认已经创建了运维平台需要的oms_monitor数据库及保留策略,不需要单独创建。
1.2.influxdb部署(rpm包)
1.2.1.获取influxdb-1.5.4.x86_64.rpm安装包
1.2.2.切换至root用户进入influxdb安装包所造目录下
1.2.3.使用如下命令执行安装
shell
rpm -ivh influxdb-1.5.4.x86_64.rpm安装过程图如下图所示:

1.2.4.授权
使用root用户,进入 /var/lib/ 目录下,执行如下命令:
shell
chmod -R 777 influxdb/1.2.5.influxdb启动**(使用root用户)**
启动前校验:确保8086端口没有被占用(Influxdb默认占用的端口实8086)。
校验命令为:
shellnetstat -anlp | grep 8086 lsof -i:8086执行如下启动命令,启动之后退出roo用户。
shellnohup influxd --config /etc/influxdb/influxdb.conf >/dev/null 2>&1 &注意:influxdb配置文件路径:/etc/influxdb/influxdb.conf,其中中定义了数据库对外端口。如果有需要修改influxdb的bind-address端口值,则注意:冒号、空格不能去掉。
如果遇到inflxudb启动后莫名挂掉的现象,有可能是在关闭当前linux连接会话终端后,会发送SIGHUP信号至influxdb控制进程,导致influxdb停止,解决此问题的办法就是将启动命令包至linux shell脚本中,然后执行shell脚本启动inflxudb
1.2.6.服务校验
使用ps –aux | grep influx来查看influxdb服务是否启动,如下图所示。

1.2.7.创建数据库以及保留策略
- 通过influxdb客户端连接上influxdb服务,连接命令为
shell
influx -precision 'rfc3339'查看/创建数据库
shellshow databases若不存在oms_monitor数据库,执行如下语句创建
shellcreate database oms_monitor创建保留策略
shellcreate retention policy rp_1h on oms_monitor duration 1h replication 1; create retention policy rp_1w on oms_monitor duration 1w replication 1; create retention policy rp_1d on oms_monitor duration 1d replication 1; create retention policy rp_1y on oms_monitor duration 365d replication 1;切换数据库
shelluse oms_monitor查看保留策略是否创建成功
shellshow retention policies on "oms_monitor";
1.3.influxdb集群代理服务(influx-proxy)(推荐)
Influx Proxy 是一个基于高可用、一致性哈希的 InfluxDB 集群代理服务,实现了 InfluxDB 高可用集群的部署方案,具有动态扩/缩容、故障恢复、数据同步等能力。
如果不需要集群代理,则忽略此章节。接下来介绍influx-proxy的部署。
1.3.1.上传安装包至安装路径下

1.3.2.解压并修改配置文件proxy.yaml
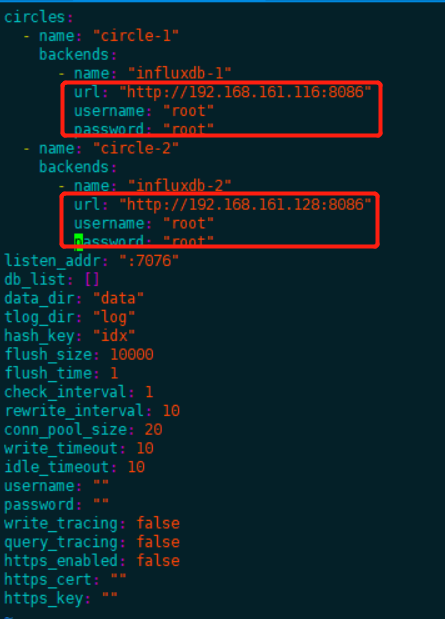
安装部署的influxdb均需要配置到此处,若influxdb配置密码,则influx-proxy需要配置每个influxdb的密码。
1.3.3.运行启动
执行启动命令。
powershell
./influx-proxy -config ./conf/proxy.yaml >out.log &或者执行执行./start.sh脚本
1.3.4.校验应用
shell
ps -ef | grep influx-proxy
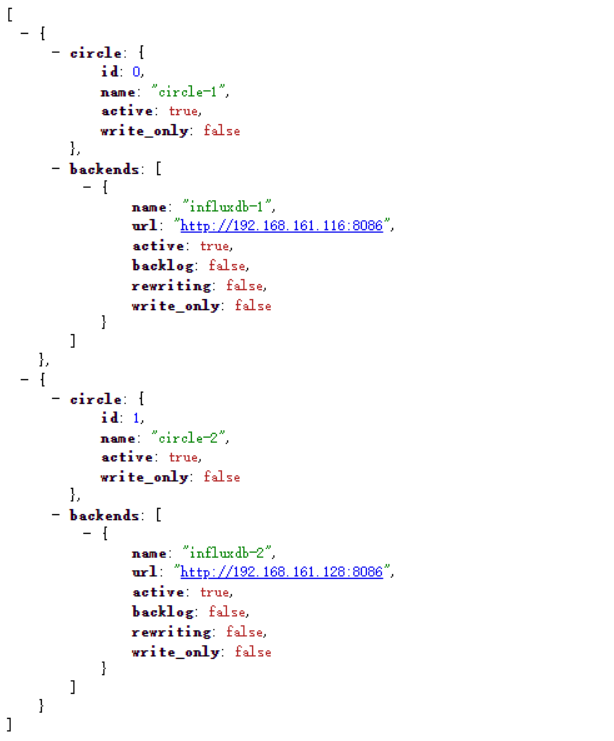
1.3.5.influx-proxy监控状态
通过在浏览器中输入:http://influx-proxy的ip:influx-proxy端口/health
1.4.influxdb双写模式(influxdb-relay)
Influxdb的双写模式,是指部署多个influxdb节点,上层通过influxdb-relay工具,实现指标数据同时存储在两个节点的模式,实现了数据的双份存储。
如果不需要双写,则忽略此章节。接下来介绍influxdb-relay的部署。
1.4.1.上传安装包至安装路径下

1.4.2.修改配置文件sample.conf
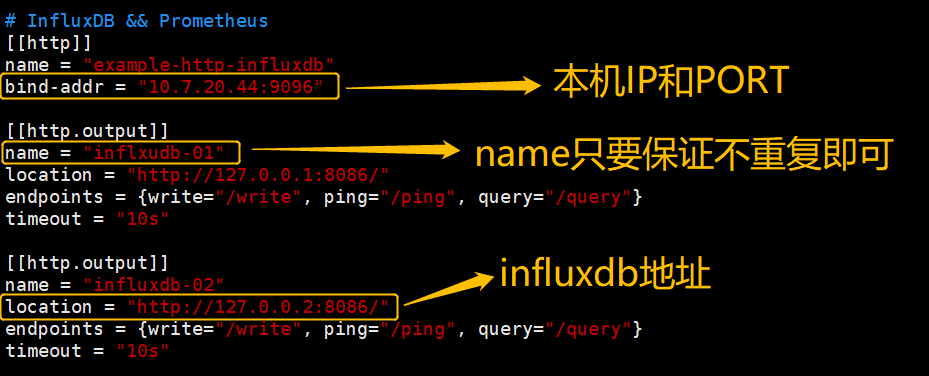
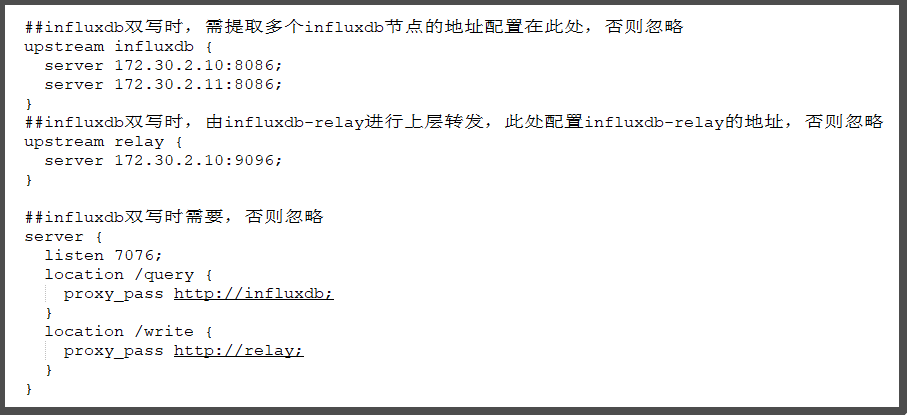
其中一个[[http.output]]代表一个influxdb节点,多个influxdb节点,只需扩充[[http.output]] 即可;使用了influxdb双写模式后,那么需要在关注nginx的nginx.conf配置文件,因为influxdb-relay只能实现双写的目的,如果涉及到读的操作,则无法完成,因此需要通过nginx进行一次负载。
如下图,当配置完成后,微服务内部涉及inflxudb的配置文件tsdb.properties文件中的influxdb.address配置项,则需要配置成server{}中配置的地址,即htpp: //nginx所在的机器IP:7076。
1.4.3.运行启动
进入bin目录下,执行启动命令。
powershell
./influxdb-relay -config ../conf/sample.conf >> influxdb-relay.log 2>&1 &1.4.4.校验应用
使用命令检测端口是否被占用
shell
netstat -an | grep PORT